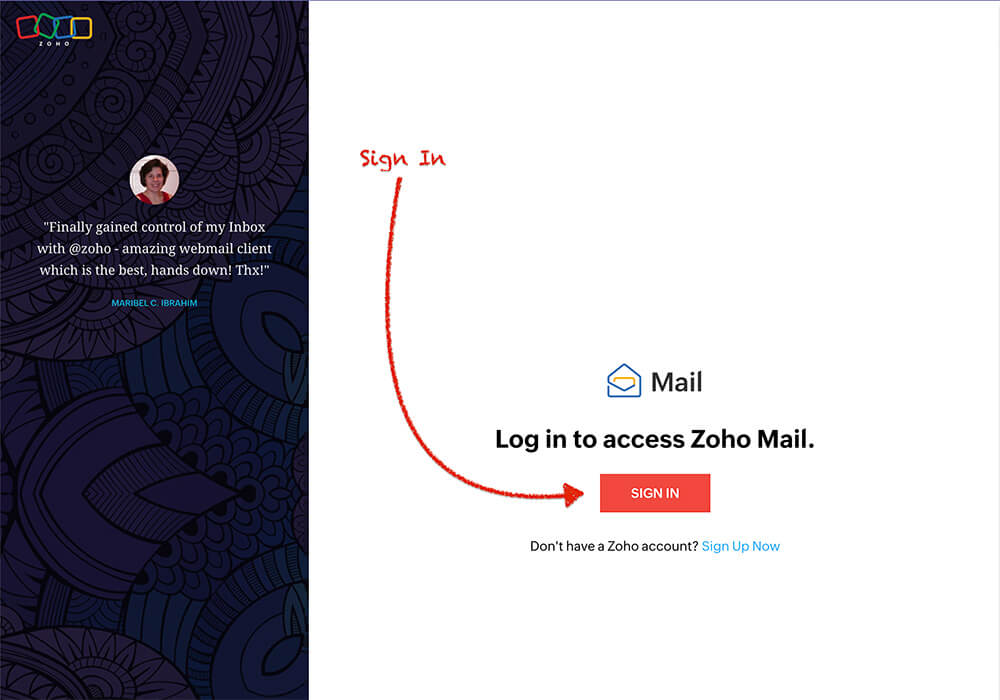
Step 1A – Log into Zoho Mail
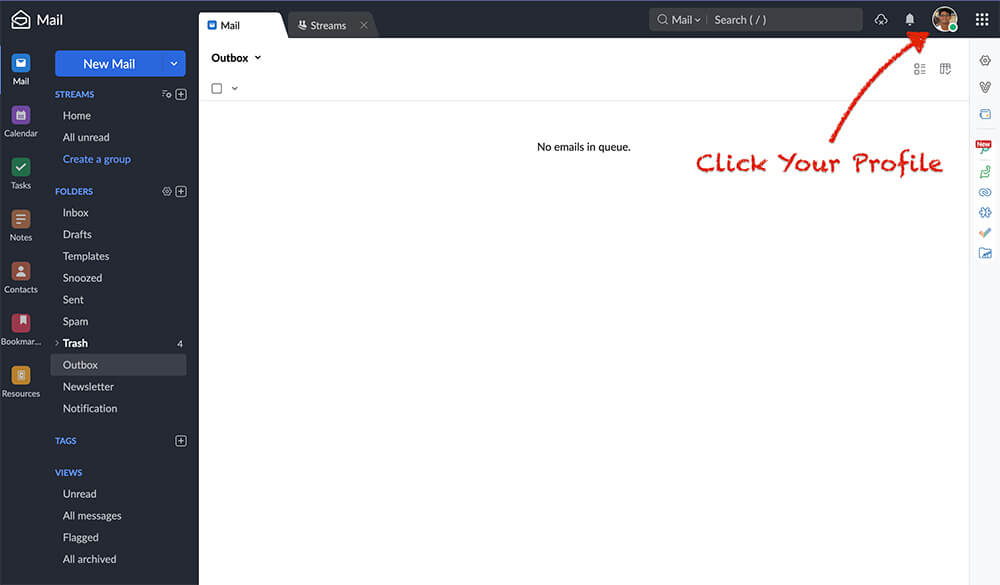
Step 2 – Go to Your Profile
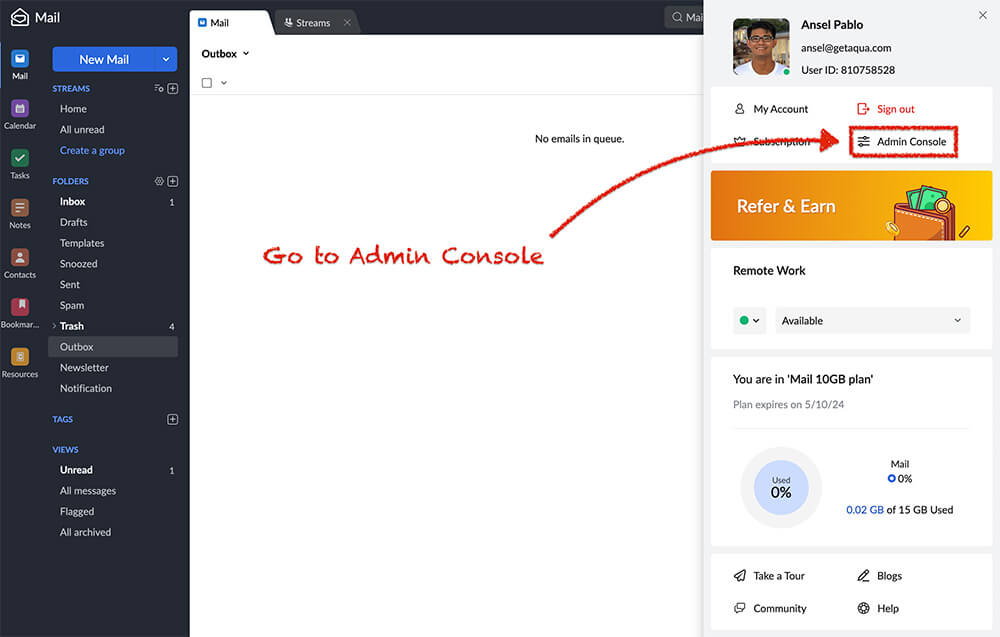
Step 3 – Go to the Admin Console
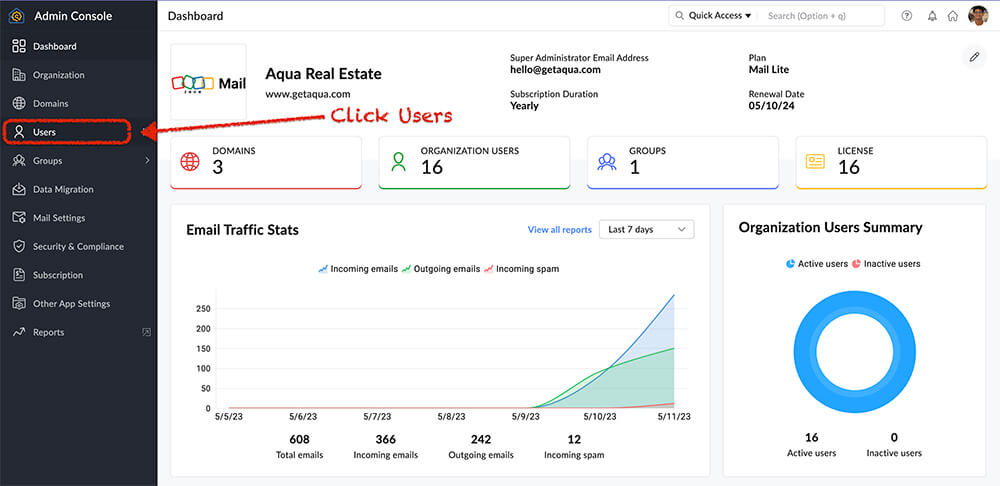
Step 4 – Click Users
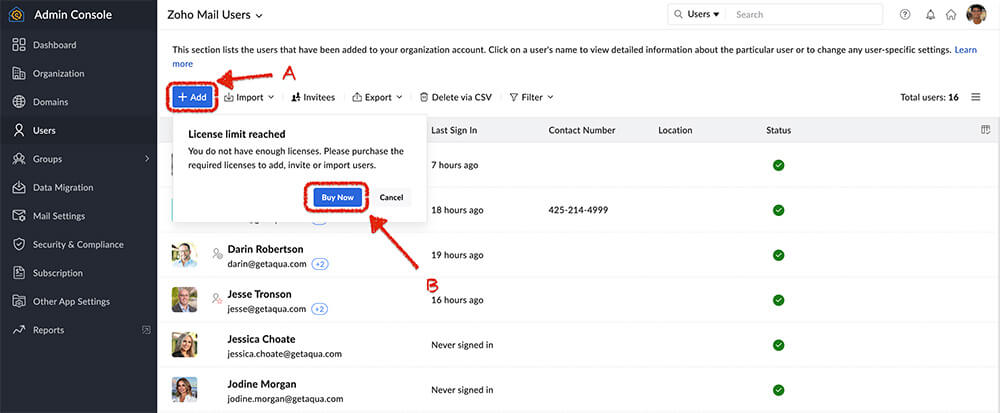
Step 5 – Add Users
Click “Add Users” and then go to the “Buy Now” to purchase additional licenses.
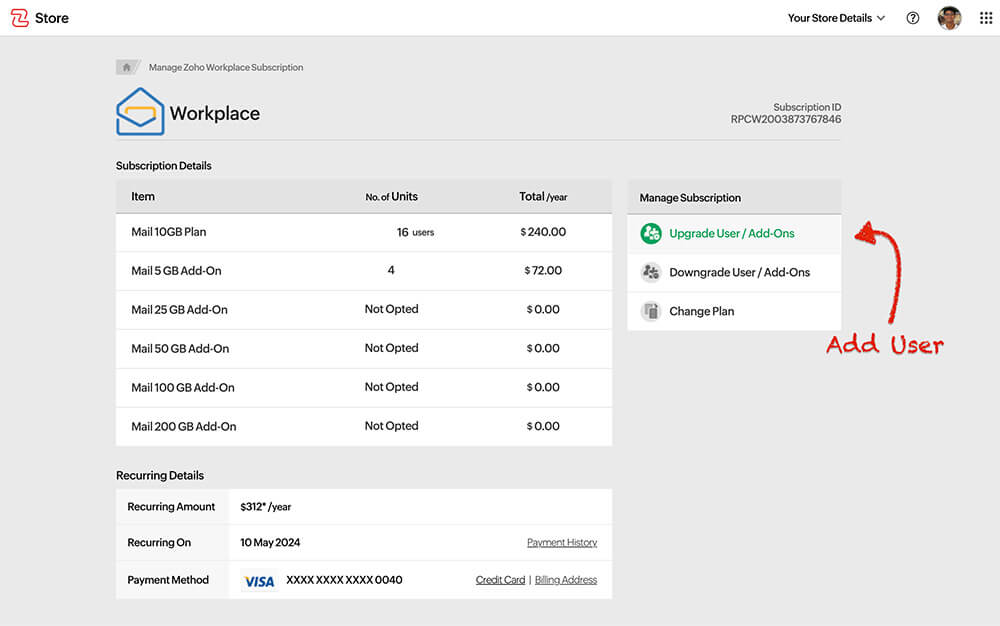
Step 6A – Purchase more Licenses
Click “Upgrade User / Add-Ons” to add more users.
Step 6B – Add Additional Users
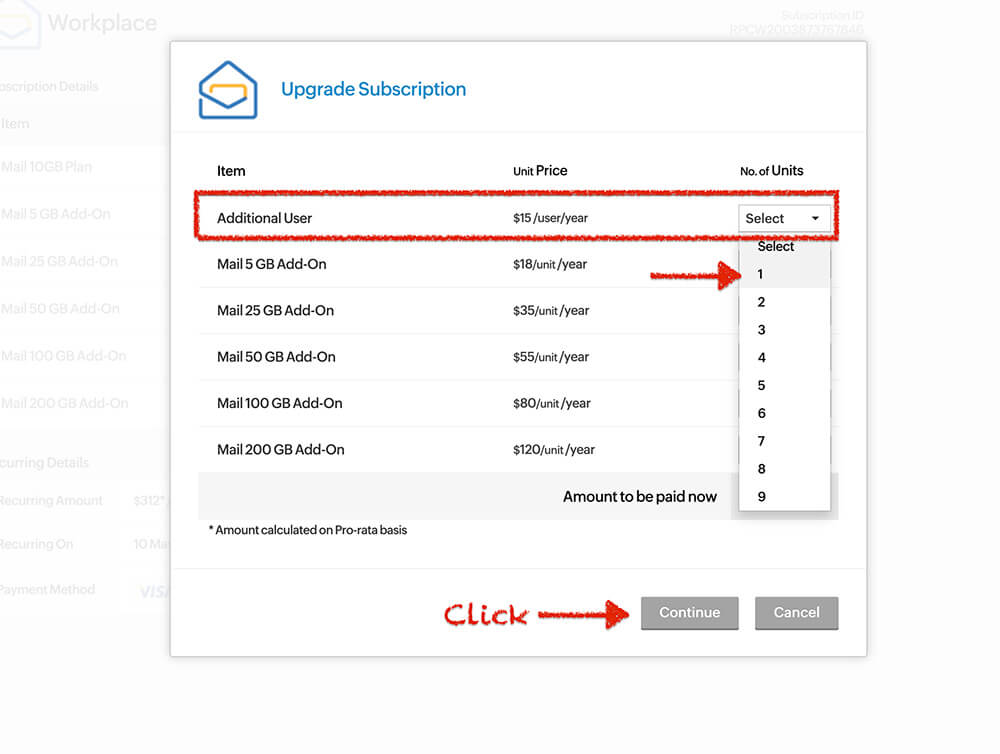
Select the amount of licenses you want to purchase and press “Continue.”
Step 6C – Add Additional Users
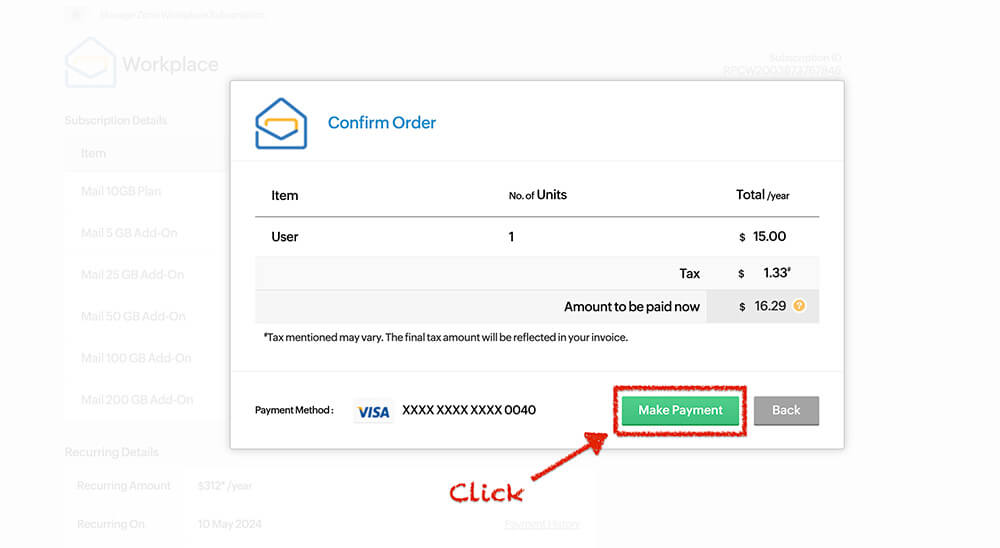
Only one license is needed per agent. Then click “Make Payment”
Step 7A – Add User
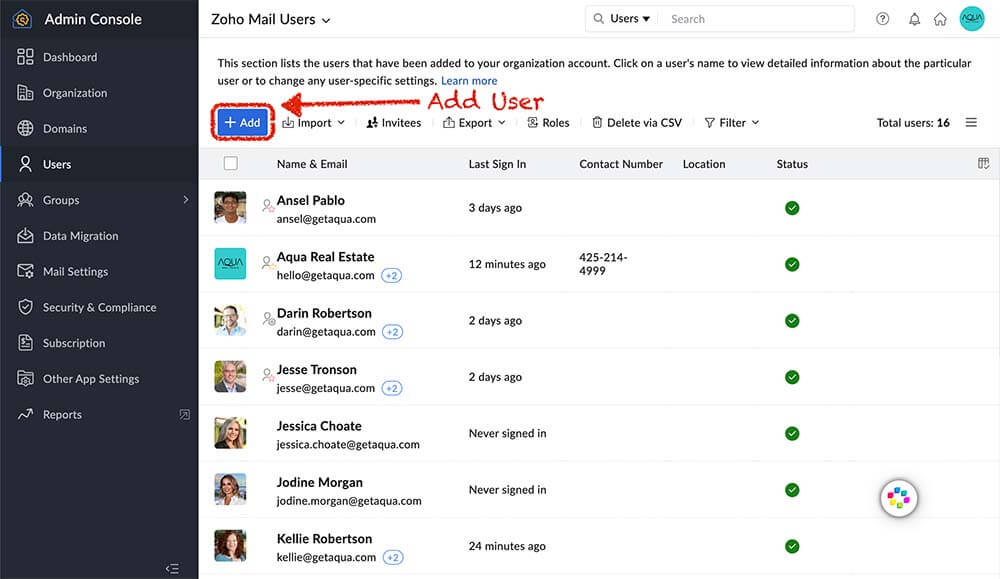
Click “Add User” to add an new account.
Step 7B – Add User Info
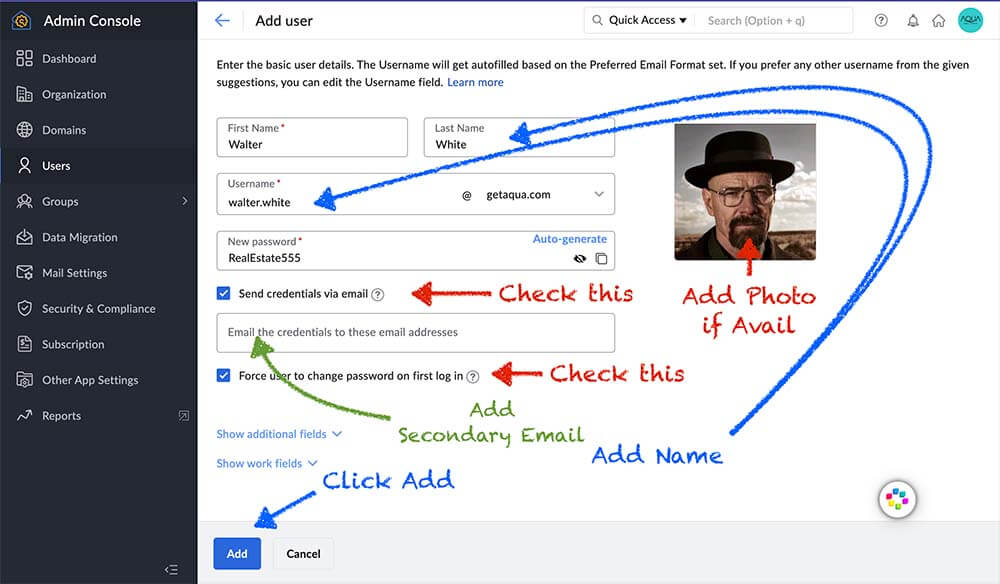
- Add the brokers name
- Add their email
- Default password is RealEstate555
- Add photo if you have it.
- Check “Send credentials via email” and add the broker’s secondary email so they get information on how to install.
- Check “Force user to change password on first log in.”
- Click Add to complete the process.
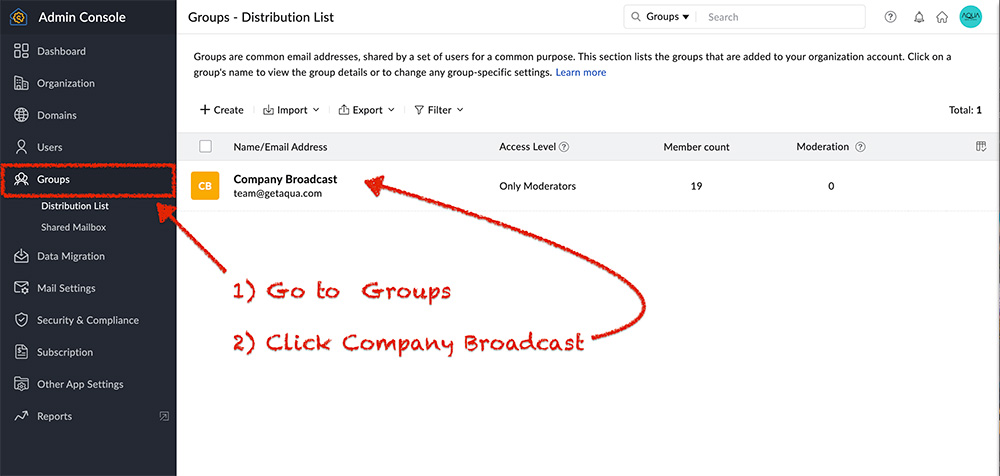
Step 9A – Add to Company Distribution List
Click “Groups” and then go to the “Company Broadcast” distribution list.
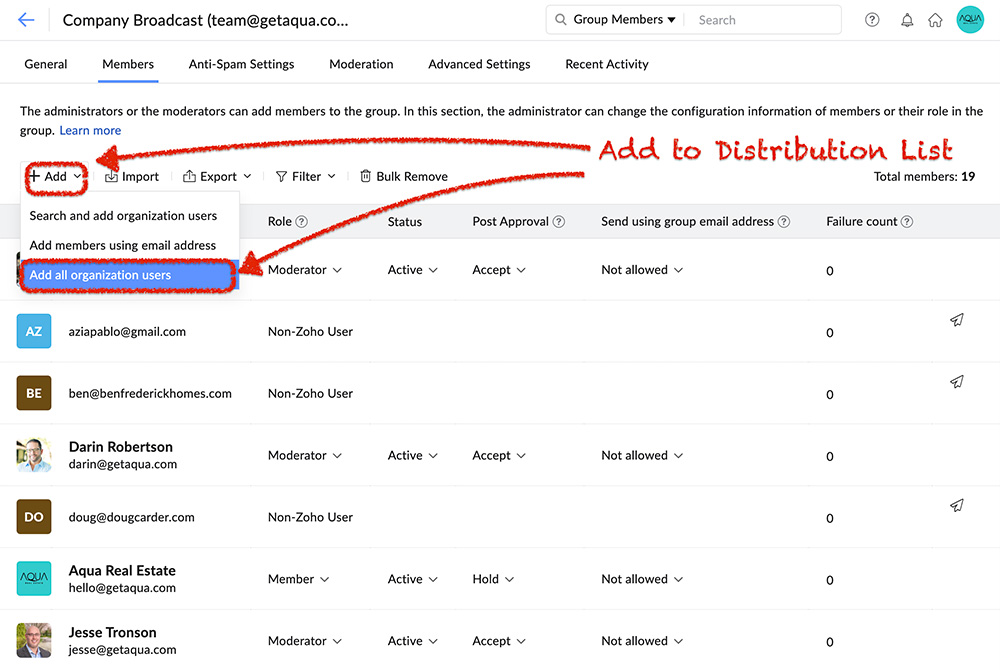
Step 9B – Add to Company Distribution List (team@getaqua.com)
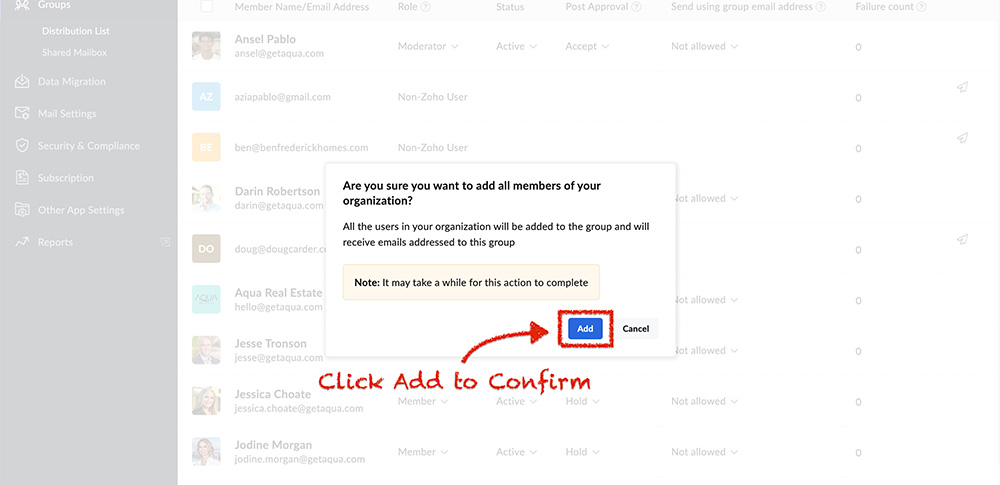
Click “Add” and then go to the “Add all Organization users” to the distribution list. This will add everyone with a @getaqua.com email to the list.
Step 9C – Confirm
Click “Add” and to confirm to add everyone to the list. This will add the newest email subscribers you just created.

